

There’s no shame in stock photography
A little over a year ago, I read an article on CNN about stock photography. As someone who considers my photography to be a bit more “artistic” than mere stock photography, I initially dismissed the idea that any of my pictures would be considered low enough for “stock” photography. This being said, my photos over on Fine Art America weren’t selling, so I wasn’t attracting the artistic crowd to my photographs. Sure, I know there’s a particular art (har har) to metadata tagging and keywords. Also, considering the price for any of my artsy photographs was probably a little high, and my reasonably limited portfolio, I knew I wasn’t going to make much money in the fine art market.
I finally decided to swallow my pride.
With my artistic photography not attracting any sales, I finally decided to swallow my pride in 2018 and dive into the world of stock photography. Fortunately, I already had a pretty extensive portfolio of photographs, so I could immediately start uploading pictures to a variety of stock photography sites. Unfortunately, most of the photos in my collection had watermarks, so I needed to go back and re-edit some of the more popular ones before I uploaded them. While this took a little bit of work, the best part of stock photography is that once a photo is uploaded and accepted, it’s able to generate revenue. There are some pretty odd stock photos out there, so you never know what people will need that your pictures can satisfy.

Now that we’re in 2019, I have some data for a year’s worth of stock photo sales. In that same timeframe, I don’t think I made a single sale on Fine Art America. However, while it’s not a huge amount of money, it’s still something. Perhaps I’ve been taking stock photos all along and just never realized it. At any rate, the first two sites I signed up on were Shutterstock and Adobe Stock. I’ve also been accepted into Getty’s iStock site, but I haven’t had the time to get most of my photos ported onto their platform yet. Let’s look at the results from Shutterstock first:

As you can see, I didn’t make many sales with Shutterstock over the last year. I think part of this is due to how Shutterstock will usually accept every picture I upload to their platform. Consequently, if they do that for me, they’ll do that for other photographers as well. With so many pictures to sort through, I think most people will have trouble finding my pictures without the right keyword tags. Still, selling 13 pictures this year is admirable. Here are the top five of those sales (that constituted 8 of the total sales):

Sure, I only make $0.25 per sale on Shutterstock, but it’s clear that I have at least one photograph that’s pretty popular. I kind of want to see what people are using “Ripples on a clear lake” for, but I’m fine with the occasional sales of it. Now, on the other side of this stock photo landscape, we have Adobe Stock. They’ve been a little more discerning when they accept my photos. Consequently, while I’ve had fewer photos successfully accepted onto their platform, they’re definitely of higher quality. I think this has helped with sales on Adobe’s site, since there are fewer photographs to choose from, but they’re all a lot better than sifting through a bunch of so-so pictures. Here are the stats for this year for my Adobe Stock sales:
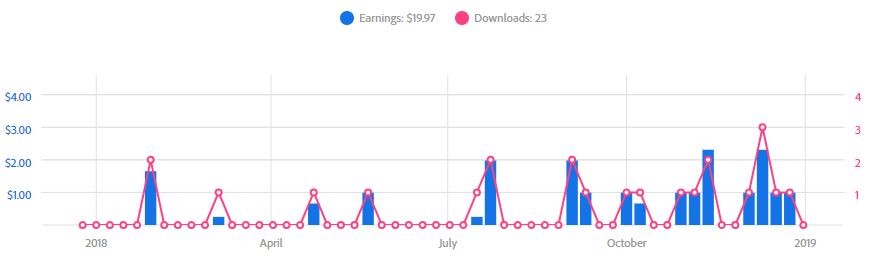
Clearly, I’ve made a lot more money with Adobe Stock than I have with Shutterstock. I’ve also sold more on this platform, with the sales coming more regularly as my successful sales are likely driving search engine results. Another plus to Adobe Stock is that they have generally paid up to $0.99 for each photo sold (sometimes it’s less, but it’s been rarer), which is why I’ve earned significantly more with Adobe than with Shutterstock. If we look at what photos were my best sellers on this platform, we’ll see a similar trend to the pictures on Shutterstock:

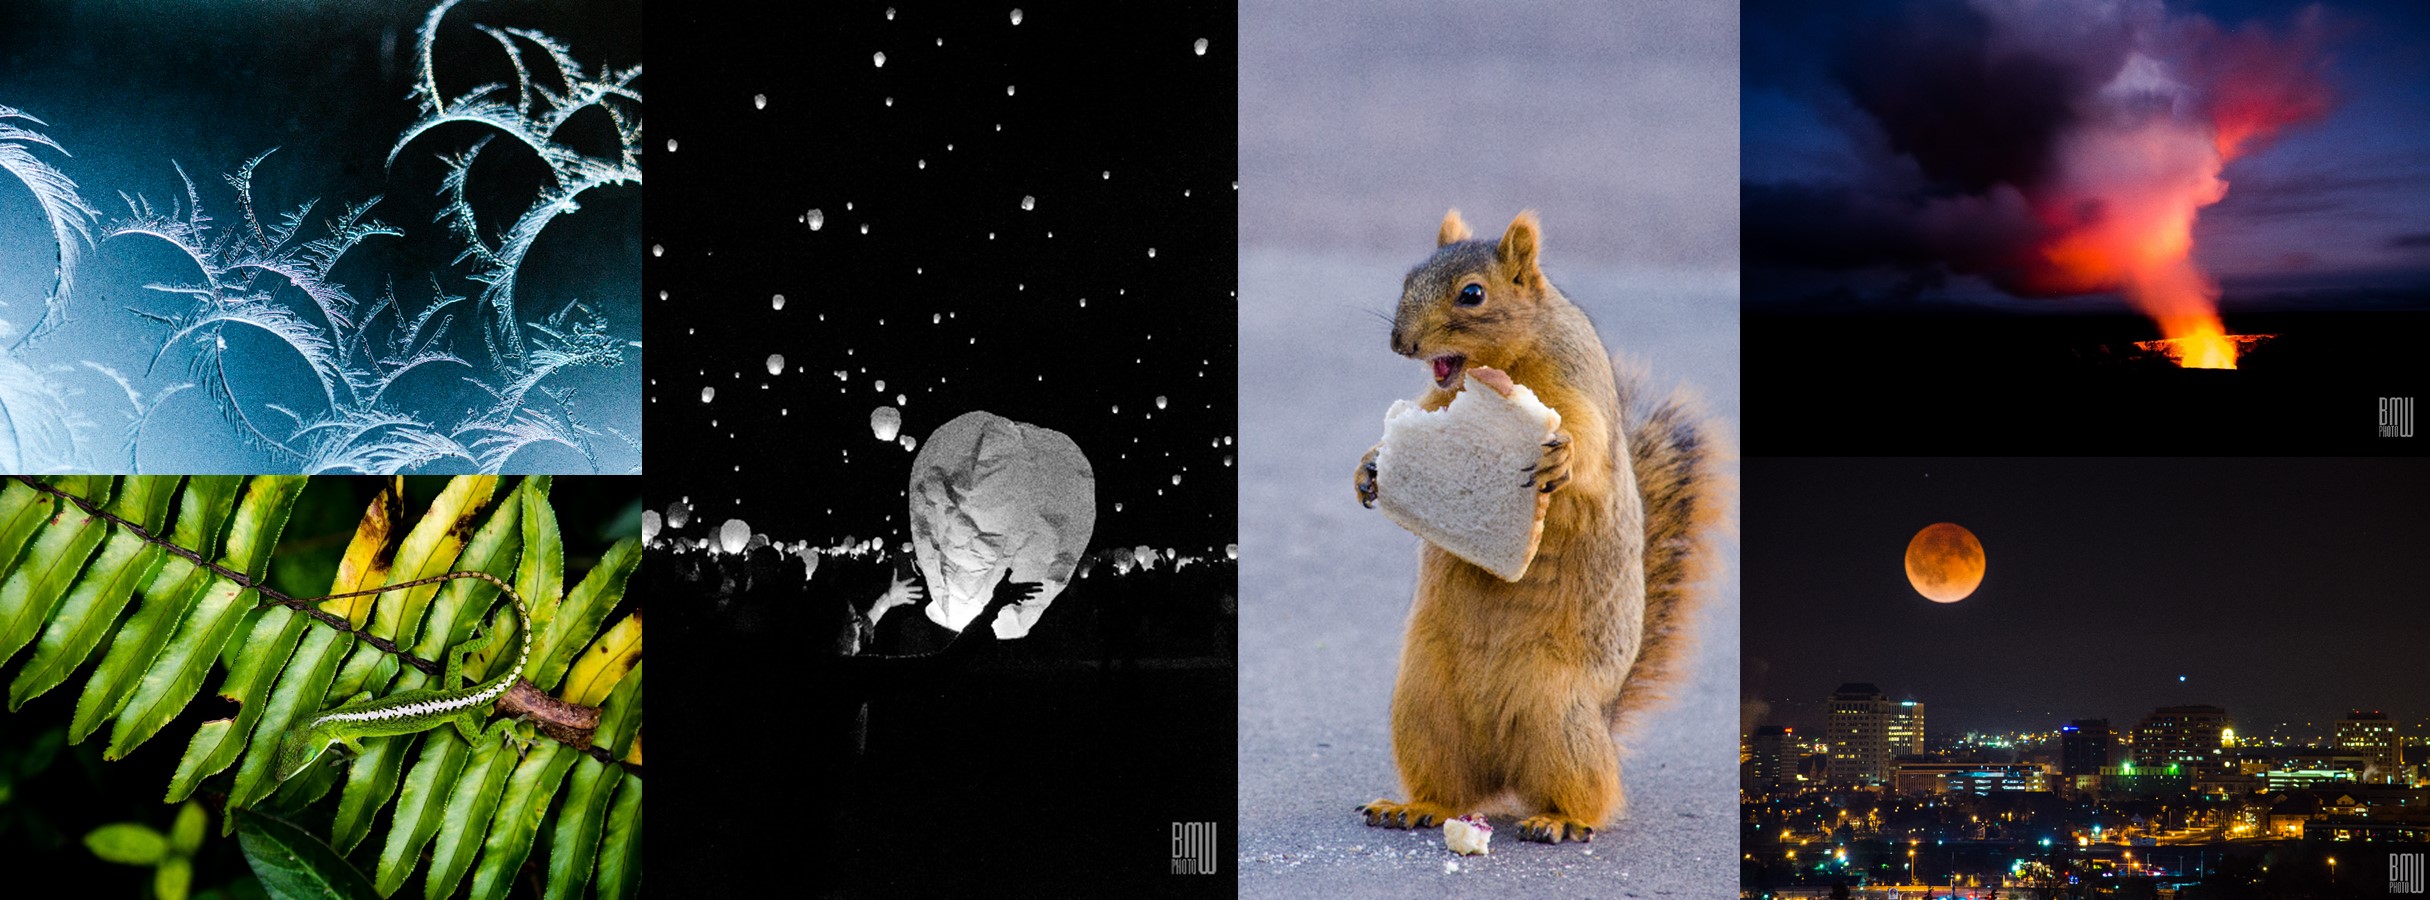
Once again, my “Ripples on a clear lake” has garnered another 8 sales, but interestingly enough, I’ve also had multiple sales of two different views of a hot air balloon, as well as a church located in Puerto Vallarta. There’s definitely a “look” to the stock photos of mine that have sold, and now when I edit new pictures, I can usually tell if it would be a potential stock photo. In any case, these photographs that have already sold will still remain up on both websites, likely garnering me more sales in the coming days and months and years.
So, what did my relatively successful foray into stock photography teach me in 2018? First of all, it’s easy to dispense with your pride when you get regular e-mails informing you that you’ve sold another photograph. If anything, it’s incredibly affirming: someone out there needed my picture enough that they paid for it. It might not be a lot, but the concept of stock photography is firmly rooted in the long game. The more pictures you have in your portfolio, the more potential sales you could have. The sooner you get those pictures uploaded, the sooner potential customers might find them. I do have quite the backlog of pictures to upload and tag, but hopefully, I’ll be able to get them up in 2019 to help me earn just that much more. And it’s not like I have to actively work on the photos that are already accepted: it’s truly a “set it and forget it” venture.
In conclusion, if you think stock photography is “lesser than” other types of photography, ask yourself: how many sales have you made this year with your more “artistic” pictures?
The four essential lenses
When it comes to “starting out” as a photographer, there’s plenty to learn about technique. Most amateurs will go out and buy a Digital Single Lens Reflex (DSLR) camera, which is a good first step. Once they have this camera, a lot of time can be spent tweaking settings to get the right pictures. From ISO to shutter speed to focal length (often known as “f-stop”), these settings will determine a photographer’s technique and are invaluable for increasing a photographer’s skill. As they begin to take more pictures with these settings, they can learn more about composition (like the “rule of thirds”) and improve their style even further. With the exception of the purchase of the camera, the amateur photographer can learn a lot for free just by playing around with the DSLR and taking lots of photographs.
And yet, there is a point where knowing how to compose a good picture and knowing what settings to use for said picture aren’t enough. One of the major advantages of DSLRs is the ability to swap out lenses. As any professional photographer will tell you, these lenses can suck up a lot of your disposable income. Consequently, many amateur photographers are hesitant to dive into the realm of lenses because it can be so expensive. What I’d like to show you is that there are really only four essential lenses that a photographer should have, and you’ll only really have to buy three of them.
1. The Kit Lens
When an amateur photographer makes the leap to DSLR cameras, most of the time this purchase comes with what is known as a “kit” lens. While not necessarily a spectacular lens by any means, it is versatile in its functions. Most kit lenses will have a range of 20mm to 100mm, which allows the new photographer enough flexibility to shoot wide shots (at 20 mm) or zoom shots (100 mm). This lens is usually small enough that it is comfortable to use in most situations. I usually use my kit lens when I’m walking around with no particular goal to my photography, as it allows me to take a lot of different pictures without having to swap lenses. 100mm isn’t necessarily that big of a “zoom,” which is why the kit lens’ range is somewhat limited. You can buy lenses that have a wider range than 20-100mm, but they can often be expensive and will likely have certain picture artifacts due to the wide range. This is partly why the next lens is important to own and is often the first lens an amateur photographer will purchase after buying a DSLR.
2. The Telephoto Lens

Depending on what kind of photography you want to do, you might find that the kit lens won’t get you close enough to take the picture you want. Whether you want to keep your distance to take pictures of wildlife or you need to focus on a specific detail of something far away, the telephoto lens is the best tool for the job. While there is a small bit of overlap with the higher end of the kit lens range, most telephoto lenses will leave off where the kit lens ends. Plenty of telephoto lenses will start around 100mm and go up to a range of 300mm. Of course, you can spend more money for the lens to go to into the higher ranges, like 500mm or more, but the majority of pictures can usually be taken within the 100-300mm range. It’s important to still have the flexibility of the telephoto lens’ range, especially if your subject moves. For advanced photographers, a “prime” lens that is permanently set at high values like 500mm can be somewhat cheaper, but at the cost of flexibility. While telephoto lenses will have a limit to how close you can be to your subject in order to focus on it, another advantage of a telephoto lens is being able to take “close up” shots. Of course, these limitations will usually push amateur photographers into their next lens purchase.
3. The Macro Lens
By this point, an amateur photographer has explored the world using the kit lens and found how the telephoto lens can bring far-away subjects much closer in order to fill the frame of the shot. But what about the pictures of the fine details of a flower, or of an insect trapped in a single drop of water? Enter the Macro lens. While the lenses up until now could zoom in and out, most macro lenses will be “prime” lenses, usually somewhere between 30mm and 40mm. This means that the “zoom” of the macro lens is solely dependent on how close the photographer can get to the subject. While there are tons of details that can be brought into focus with these lenses, the sacrifice is usually in the form of depth of field. This isn’t necessarily a bad thing but does require a bit of a steady hand to ensure the subject remains in focus. Of course, with a narrow depth of field, this lens is also great for taking portraits, as the background will easily blur out and leave the person’s face in full focus. At this point, most photographers have all the tools they need to take whatever pictures they want. Whether it’s a far-away subject with a telephoto lens or a nearby subject with a macro lens, nothing is outside the photographer’s range. Of course, the artistic photographer might want to take that one extra step and purchase one final lens.
4. The Fish-eye Lens

Some different “effect” lenses are available for DSLRs, but one of the most common—and also easiest to use—is the wide-angle or “fish-eye” lens. Basically, while the kit lens provides a wide angle at 20mm, the fish-eye lens will be closer to 10mm, which provides a distortion to the scene that can be used to great artistic effect. With a wide-angle lens, the outer edges of the picture will be “warped,” while the center of the frame will look like it is very far away. Often, these fish-eye pictures can capture the entirety of a room, sometimes even accidentally including the photographer in the frame as well. Some of the best wide-angle shots take advantage of the lens’ ability to warp a scene and create a unique view of the world. The previous three lenses in this post are easy to use in the sense that a photographer can compose the shot they want before even bringing the viewfinder to their eye. Unfortunately, it does take a bit of practice to notice where a wide-angle lens would create a different perspective, as the warped view isn’t something we usually experience with our eyes.
In the end, I feel these four lenses provide the right amount of flexibility and number of options for a photographer. Almost any scenario they might encounter can be captured with these four lenses, and I know they’re mainly the only four lenses I keep in my camera bag. While buying the “top end” versions of these lenses might be more in the realm of the professional photographer, most of these lenses have lower-end models that can usually be obtained for a few hundred dollars online. They might make an excellent birthday or Christmas gift for the photographer in your life (just make sure you know what they have before you buy). For the thrift-savvy photographer, plenty of these lenses can be found on eBay or in pawn shops, usually priced to sell because they have very specific uses.
Just remember, you don’t have to buy all these lenses at once, but your photography will likely improve with each new purchase.
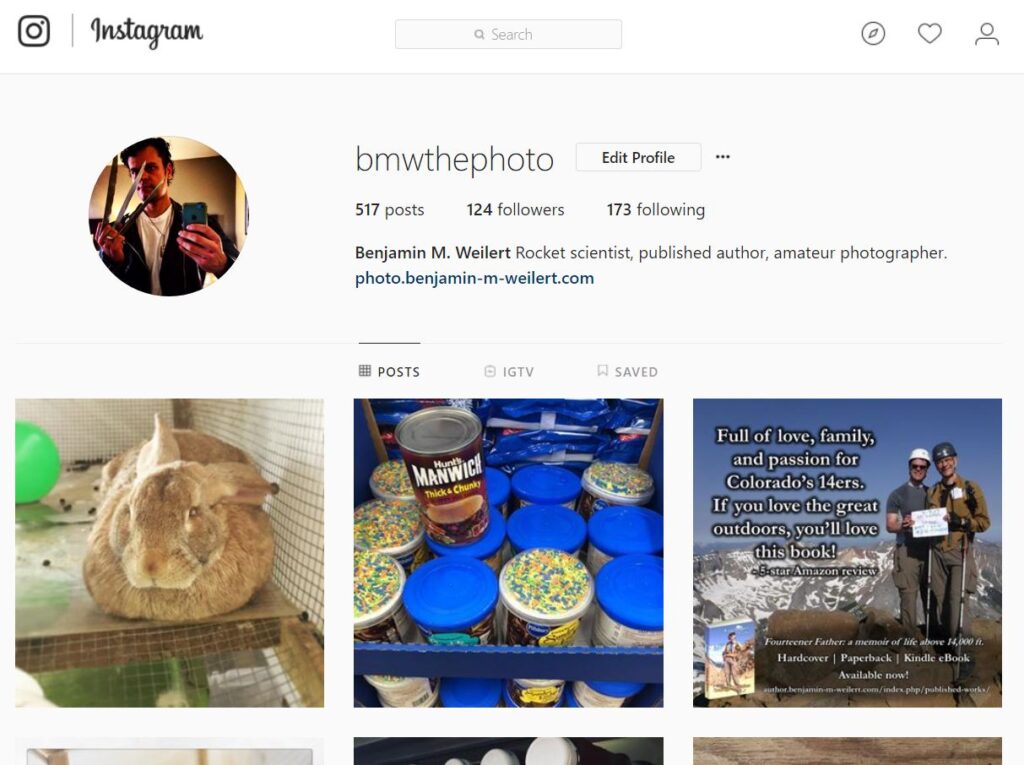
Instagram’s missed opportunity
As a photographer, there are plenty of places I can upload my pictures so that people can see them. Not only can you submit photos to stock photo sites like Adobe Stock and Shutterstock, but you can utilize marketplaces like Fine Art America to sell your photography. Often, this doesn’t necessarily help strengthen your brand, as each picture can be lost in a sea of other photographs that other photographers are trying to sell. Even photo sharing sites like Flickr are merely a reliable place to store your pictures so that they can be pulled up quickly and used on other parts of the web.
If I want exposure, I need to utilize the “big three” of social media to get my pictures out to potential viewers. Facebook allows me to post on a scheduled basis and collect my pictures into albums, but many more people are utilizing hashtags on Twitter to gain views and followers. Of course, there is the most obvious place to post photography in a social setting: Instagram. A lot of photographers will strictly stick to Instagram due to its focus on pictures, but it still has some weaknesses.
While the limitations of the square format for Instagram pictures has since been lifted, the main weakness with the platform seems to be discovery. It’s difficult if not impossible for me to find other photographers, let alone have other photographers (or potential buyers) locate me on Instagram. Sure, we’re all supposed to use hashtags to link our work to the zeitgeist of the trending topics, but if you happen to use the wrong hashtags, you’re still going to be hidden underneath the endless sea of selfies and plates of food.
Instagram as a service seems to be mostly used by people who want to post their social life in pictures, and not necessarily as a place for photographers to show off their best photos. After all, many photographers will want to know how they stack up against their peers. I have found over the years that photography contests can be equally validating and frustrating. If you win contests, your work is validated. If you lose, even with your best effort put forward, it can be frustrating to see a picture that you think is aesthetically inferior being preferred over your own. While wide-open photography contests pit the best photos of each photographer against each other, themed contests are a chance for photographers with a few lucky shots to show off their skills—even if they haven’t put in the time and money to reach a professional level.
The other problem with some contests is that the judging can be limited to a single individual, whose aesthetic tastes might not be the same as the photographers who submit to said contests. Judging pictures by a committee are somewhat better, as any personal biases are usually canceled out in the end. While I understand it’s difficult for a single photograph to be everyone’s favorite, the scientist in me thinks the sample sizes for judging are far too small in these contests.
Unless a photographer is actively searching for contests to submit their work, there aren’t likely to be many contests in their geographic region where they can enter their photographs. Similarly, there may be plenty of websites that run photography contests, but finding ones that seem legitimate can be challenging as well. Let’s also not get into the fees for contests, which can include any production costs for printing and framing, as well as just baseline entrance fees.

So, where does this put the photographer who wants to compare their work against other photographers’? A couple of months ago, I saved an advertisement I saw on Facebook for an app/website called Gurushots. When I saw the same add on Instagram a few weeks ago, I decided to give it a try. I was immediately hooked. This was exactly what I was looking for! The setup is designed to have all photographers judge each other’s work, thus advancing the pictures that are considered “the best” into the higher tiers of a variety of competitions and contests.
Gurushots is essentially a free-to-play photography game that has a series of “tiers” for the photographers who participate. Each tier requires you to meet certain criteria, like having a photograph reach “all-star” status, or successfully swapping a poorly-performing photograph for a better one. These tiers helped motivate me to find the somewhat more obscure pictures from my portfolio that would best meet the theme of the contest, and thus help me to move up the ranking. Each contest on Gurushots also has a series of tiers for your photos, ranging from Popular to Skilled to Premier to Elite to All-Star, which are used to help unlock the different photographer tiers. I was extremely validated when, within the first week of starting the game, I reached “Expert” status—three short of the titular “Guru” tier. To do so, I had to rack up 3 Skilled rankings, 10 Premier rankings, 15 Elite rankings, 5 All-star rankings, successfully swap five pictures, earn 15,000 Gurushots points, earn a top 30% rank in a contest, and earn a top 20% rank in a contest. The fact that I was able to reach such a high tier so quickly really boosted my confidence as a photographer.

Of course, there is a “game” element to Gurushots as well. There are three limited resources: swaps, autofills, and boosts. Each of these can be bought with real money, but meeting certain contest and tier criteria also reward these resources. The “swap” allows you to exchange photos, as I mentioned earlier, but the “boost” allows your pictures to be more heavily featured in the algorithm for the contest they’re boosted on so that more people can see it, and thus more people can vote on it. Most contests will have a 24-hour period where the “boost” ability is free, so you need to come back every day to ensure you don’t miss a free opportunity. The “autofill” is similar to the “boost” in that it increases your exposure during contests, but only by maxing out the “Exposure Bonus” meter for a 24-hour period. I’ll get into the “Exposure Bonus” next, as it’s what I think is the best part of the game.
On Instagram, you can get “likes” and “comments” on your pictures, but these metrics don’t translate into more views for your photographs. In Gurushots, you can vote on the other photographers’ pictures for the contest you’re entered in, which in turn increases the exposure your own photographs receive for the contest. Since this meter slowly depletes over time, you must keep coming back to ensure your photos receive a high Exposure Bonus for an extended amount of time. This solves the “sample size” problem of photography contests: the more people who have the chance to vote on your picture, the more votes your picture will likely receive. These individuals can also like and comment on your pictures—like the current setup of Instagram—but the votes are really what count here.

So, why is Gurushots a missed opportunity for Instagram? I think most people use Instagram for its intended purpose: as a social network. However, what I wouldn’t give to also have the ability to submit my Instagram pictures to photography contests where I can compete against my friends and other photographers around the world. Gurushots does have the ability to follow photographers, as well as to ask your friends to join the game, but it seems less-developed than Instagram’s ability to combine picture sharing with your friends and family. Plus, if Instagram made it so your pictures reach the people you don’t typically interact with (via the same voting system mentioned above), then independent and unknown photographers could quickly create a following of fans without as much work as it currently takes on the platform.
I know it seems like I’m gushing all over Gurushots, and I can assure you that this is not a paid advertisement for them. However, I think it’s the boost in confidence that many photographers might need to keep refining their craft. These contests force us to try new things, explore new ways to photograph our world and see how other photographers are doing new and interesting techniques with their own photography. If you want to follow me on Gurushots, you can use this link to my profile.
. . . then comes baby carriage
Like I said last month, one of my weaknesses as a photographer is taking pictures of people. There are certain challenges when taking pictures of a proposal, but there are somewhat different challenges when taking pictures of weddings or newborns. When another friend of mine asked me to take pictures of their newborn son, I was happy to oblige, even if I had to let them know it isn’t my forte. I had a rough idea of what to do, but I also learned a lot. Since this was my first time taking pictures of an infant, there were plenty of lessons learned. If you’re looking into expanding your repertoire to include infant photography, the following are a few things to consider:
 1. Lighting
The fundamental element of photography (aside from the camera itself), lighting determines a lot about how you take a picture. It will determine if you need to increase your ISO or shutter speed settings. While you can control the lighting indoors, it’s often not bright enough. If you have your own set of lights, you might be able to overcome this indoor challenge, but these lights can be expensive. The natural light of outdoors is usually bright enough but has its own quirks. If it’s too bright, the child might be squinting in the pictures. The shadows will also be sharper with bright sunlight, which isn’t necessarily something you would want for these kinds of pictures. Light cloud cover will soften shadows and should provide enough illumination to work with, even if it can be a little inconsistent. In the end, if your pictures look “soft” with the lighting you have, you’re doing well!
2. Parental requests
Even though you are the photographer, and would know what works best for you, the parents are ultimately the individuals who are paying you for your service. If they have specific requests for the photo shoot, you should try to oblige them the best you can. If they have an outfit or prop they want to be included in the pictures, don’t deny their request. Still, make sure you’re comfortable with the kinds of requests the parents will make. If you feel the infant might be in danger, you can deny the specific requests. If you are required to bring clothing or props for the child, you can gently express that the parents should provide those things for the shoot. Even if you think the parents’ ideas are silly or won’t work, the worst that could happen is that the pictures just don’t turn out.
3. Gear and settings
For this particular photo shoot, I was dealing with rainclouds and intermittent weather issues that limited the amount of time I had to shoot. The baby was also somewhat fussy, which added to the challenge. In terms of lenses, you’ll likely want a macro / close-up lens that will allow you to get close to the child and create a narrow depth of field to blur out the background. When I downloaded the pictures, I found that my shutter speed wasn’t nearly fast enough. Many of the photos were blurry because the infant was moving too much (as babies are liable to do). You might have to sacrifice graininess (by increasing ISO) in order to get the right shutter speed, but the shutter speed should be prioritized when you’re choosing your settings.
 4. Post-processing
When you finish the shoot, you’ll have a ton of pictures, most of which will be pretty similar from image to image. Get rid of anything that’s blurry (again, shutter speed is key), and find the pictures where the baby is smiling (a rare treat, but worth the parents’ money). Since you should be taking pictures in RAW format, use Photoshop (or your program of choice) to perform a few simple post-processing tweaks to get the perfect pictures. As I mentioned during the section on lighting, you’ll want the pictures to appear “soft,” so tone down shadows and highlights while also minimizing contrast and clarity. You’ll know you have the right post-processing settings when the baby will start to “glow” just a little bit. This removes most minor blemishes on the baby’s skin, as well as giving the photos a “heavenly” feel. At this point, you might want to do some black and white versions, which can also remove some sharp contrasts in color to add to the soft effect.
In the end, I had a couple dozen passable shots when my photo shoot was finished. I could have had quite a few more if I had applied the tricks I mentioned above. Some aspects of the shoot might be out of your control, but if you do your best with what you have, you might get some good photographs for the happy parents.
First comes love . . .
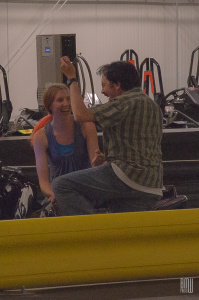
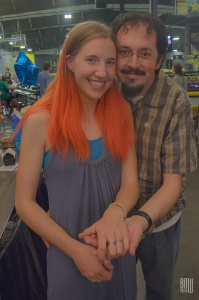
I’ll be the first to admit that one of my weaknesses as a photographer is taking pictures of people. There are so many variables that are difficult to control when a person is the subject of a photograph. Lighting, pose, background, depth of field, etc. etc. etc. Consequently, I have not had much experience taking pictures of people, as most of my best images are more along the lines of “still life.” Still, when a friend of mine was planning to propose to his girlfriend, he asked me to take pictures of the event. Considering that he introduced me to my wife many years ago, I figured I owed him and agreed.
Because I don’t regularly take pictures of proposals, there were some lessons I learned during the experience. If you’re thinking about delving into the world of proposal photography, here are a few things you might want to consider:
1. Location, location, location
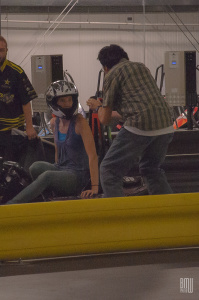
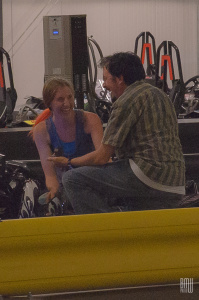
Usually, the photographer does not get to pick the location for the proposal. In my case, I was shooting at an indoor go-kart track, so my lighting and background options were limited at best. If you have any say in this portion of the proposal, suggest somewhere that is well-lit and has plenty of places to hide or blend into a crowd. A nice hike in a natural area can be preferred, but again it’s up to the person who is requesting your photographic talents. Fortunately, most DSLRs are powerful enough to get some decent shots, regardless of location, but the pictures are usually better in ideal conditions. If the location is a business or other establishment, be sure to check with the owner or manager ahead of time to make certain that you can take pictures there.
2. Hiding in plain sight
Most proposals are a surprise to at least one of the participants. If you’re there photographing the event, it can be easy to spoil the surprise with your presence, especially if you’re the only other person there and you’ve got a huge camera pointed at the happy couple. Like I said above, if you can pick the location to best hide for the special moment, then the pictures will be that much more candid. This is especially critical if the person being proposed to already knows what you look like (you might want a slight disguise if this is the case). In my case, the proposal took place in a public space, so there were plenty of people and activities happening to distract from my presence. To ensure that it didn’t seem like I was there just for them, I showed up well ahead of time and took some pictures (or pretended to) of the go-kart races to make it look like I was merely there to photograph the venue. This helped me hide in plain sight and improved the candid nature of the pictures.
3. Gear and settings
There is one priority for this kind of photography: capturing “the moment.” If you have the right gear and set up your camera correctly, this is merely a matter of taking as many pictures as possible. To help you hide in plain sight, a telephoto lens is a must. It’s a little hard to keep the proposal a surprise if you’re right there in their faces. If you know the exact spot where the proposal will take place ahead of time, you should scout out a few angles so that your backgrounds won’t be too distracting. Additionally, you’ll want to have a fast shutter speed to capture the reactions. If the venue is dimly lit, you might have to increase the ISO, which can produce grainy/noisy pictures (again, if you can influence the location, this is something to keep in mind). Finally, you’ll want the moment in focus. If your f-stop is large, you have a better chance of capturing the “yes” without being blurry. Just be careful that the f-stop isn’t too high, or you might have a distracting background in focus too. If you can manage to remain inconspicuous with a tripod or monopod, this will help your pictures immensely as well.
4. The money shots
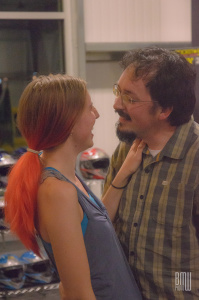
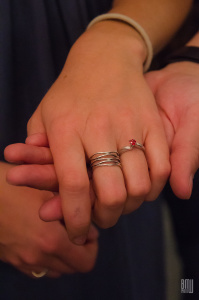
As we all know, the moment of the “yes” is what you’re trying to capture here. However, there are a few other “money shots” that you’ll want to be sure you get as well. A few pictures of the lucky person being proposed to as they’re obliviously led to the proposal are nice, but the best photos are after the deed is done. Make sure you get a few romantic pictures of the happy couple, including kisses, embraces, and all that lovey-dovey stuff. Similarly, there’s generally a ring involved with these proposals, so you’ll want to get a close-up of the bling after the dust has settled. Since you have been asked to take pictures, don’t hesitate to be in more control of the poses and placements of the photos after the proposal has taken place. They’ll want to remember the moment fondly, so they’ll usually accommodate.
So, while I took some passable pictures, I certainly know what I’d do differently were I to do it again. These two people will be married in a couple of days. I’m just glad they didn’t ask me to photograph their wedding. That’s a whole other topic which I am not nearly experienced enough to discuss.
The Great American Eclipse
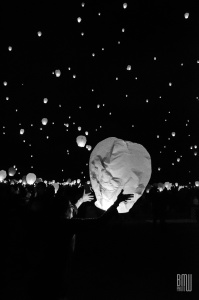
Back in 2010, I was curious when the next total solar eclipse in the United States would happen. After looking it up on Wolfram Alpha, I learned that it would take place in seven years. I also found that the path of totality would pass near where I lived at the time. At that point, I decided that I would go out to see the total solar eclipse when the time came. Fast forward to 2017, and I had moved from Alabama back to Colorado, so my totality viewing location had moved from Tennessee to Wyoming. I think I always intended to photograph the total solar eclipse, but as the day approached, I realized I had little knowledge on how to shoot it.
While the glow typically looks white, a “temperature shift” in editing can create a picture like this.
From my photography of the moon, I knew I would need my tripod and remote, as well as a lens large enough to fill the frame with the subject. Fortunately, I already had this equipment, so the one piece I was missing was a solar filter. Since the diameter of the two lenses I would consider up for the task were quite different, I had to make a decision about which one I would buy the solar filter for. I ended up going with my 500 mm mirrored prime lens (which has a diameter that was almost 90 mm across) because I also had a 2x teleconverter that could essentially increase the magnification to that of a 1,000 mm lens.

About two weeks before I made the trip up to the totality zone, I attended an astrophotography get-together where the subject of photographing the total solar eclipse was the topic of the night. Most of the people there had seen the eclipse in 1979, so they had plenty of good advice that I took to heart in my preparations for the event. On top of things like practicing with the solar filter during a sunny day, bringing a headlamp (that I didn’t end up needing), and reminding me to bring a light jacket (which you’ll likely put on prior to totality), I learned the all-important settings to have on my camera to ensure the best photographs. They were as follows:
- ISO at its native setting (essentially, as low as it can go)
- F-stop in the range of f/8 to f/16
- Shutter speed in the range of 1/30 second to 1/4000 second
- Lens focused to infinity
- Stabilization and other time-consuming settings turned off
- Bracketing turned on to ensure at least one picture of each set is correctly exposed
I ended up using an ISO of 100, f-stop of f/8, and a bracket of three shutter speeds: 1/1000 second, 1/250 second, and 1/60 second. While these settings did allow me to take many great pictures, they seemed optimized for the lead up to the moment of totality. It would be neat to take a picture and be able to see the features of the moon with the solar halo behind it, but I’ll have to wait for the next total eclipse to try for that picture. Similarly, I had a high definition digital camcorder set up to record the entire eclipse (the solar filter for this camera was just a pair of eclipse glasses taped over the lens), but it was zoomed in so much that I had to perform the same adjustments each time the sun moved across the frame. Next time I might keep it in a wider setting to show the entire progression across the sky.

Because my 500 mm lens needs an adapter, the “infinity” setting on the focus ring wasn’t entirely accurate. Furthermore, this lens is quite finicky in its focus, so after focusing to infinity, I taped it in place, assuming that it was as sharp as I wanted. I’m not sure if it just wasn’t focused to begin with, if it was the Wyoming wind jittering my tripod (I ended up taping my camera strap to the tripod), or if the addition of the solar filter tweaked the focus, but most of the pictures I took ended up being slightly blurry. They still convey the essence of the eclipse, just not to the sharpness I may have wanted. What I may do in the future is add a ring on this lens that would create a new “full stop” for the focus ring at infinity so it would be easier to ensure a sharp focus. I’d also have to make a ring for the lens in its 1,000 mm configuration since the teleconverter is another addition to the focal length. Either way, I have time before the next total eclipse to figure it out.
One of the other problems I had during the eclipse was with my tripod. I may need to invest in a higher-quality one because there were a few problems I encountered with this one that made aligning the sun in the frame a frustrating chore. Each time I adjusted it, I held the tripod with my free hand; therefore, when the picture was composed, I would release my hands, and the subject would move in the frame, often quite dramatically. Since the earth rotates significantly at the distance I was zoomed to, I needed to continually adjust the camera’s aim to keep the sun in the frame. Being able to do this quickly and smoothly, with as little re-adjustment as possible is the ideal, but my tripod was so “stiff” that I was always tweaking the alignment to get the sun in the frame. If I had the money for it, an automated tracking setup would be helpful, as it uses computers and motors to follow the sun.

Logistically, viewing the eclipse is easy in theory, but a nightmare in execution. The event is much like any large sporting event: people will arrive at different times, but they’ll all leave at the same time. It took us 8.5 hours to get back to Fort Collins, and I still had a 2.5-hour drive back to Colorado Springs. What we should have done from the start was use the printed maps of the back roads of Wyoming to make our way home, since even the state highways were almost immediately backed up following the end of totality. If I were to do it again, I’d go up a day ahead of time, watch the eclipse, and then leave the following day when all the “day tripper” traffic dissipated.
Finally, even though part of my focus was on photographing the eclipse, it was important to take a moment to just soak in the experience of it. If you’re too focused on getting the “perfect picture,” you’ll likely miss out on all the little things you wouldn’t usually notice. From the crickets slowing down due to the drop in temperature to the birds chirping and cows laying down, the full experience of the total solar eclipse is in the awe inspiring sight above you as the day instantaneously turns to night around you. Words are inadequate to describe the experience. If anything, a total solar eclipse shows the awe-inspiring brightness of the sun. Even at 99% partial coverage, it was still pretty light out. I didn’t need sunglasses to look around, and the “gray” light almost seemed fluorescent. But once that totality hit, the darkness was practically instantaneous.
The eclipse is a practically indescribable event. You have to see it to believe it!
I’m at an age where I have the potential to see five more total solar eclipses if I can live to be 94. After this experience, I know I will try to be in the path of totality for every one of them. I know where I’ll be in seven years. What about you?
Nature up Close
When you think of nature, what’s the most impressive thing that strikes you about it? Is it the grandeur of the landscapes? Is it the minutia of the small components that make up the world? For me, it’s definitely the scale of nature that always strikes me as majestic. I can climb a mountain that towers above the plains; but even on the peak of this mountain, I can find the tiniest flowers. In focusing on the small elements of nature, I’ve found some fascinating photographs.
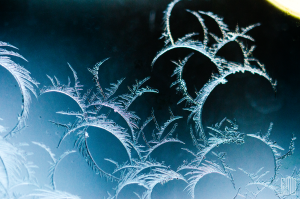
While climbing Mount Bierstadt, I came across this grass covered in frost.
Even before I had my DSLR camera, I found a setting on my point-and-shoot digital camera that could be used for macro photography. Being able to get close to something and capture it in a picture felt like I had the world under a microscope, even if the capabilities of the camera were limited.
Ice is fascinating to photograph, especially with the right lighting.
One of the first lenses I had to purchase once I bought my DSLR was a macro lens. The kit lens just couldn’t get close enough to focus on the small details of nature that I wanted. Of course, once I got this macro lens, I found that taking pictures with it wasn’t as easy as it once was. Maintaining focus on my subject proved to be difficult without a steady hand. I could open up the f-stop to increase the depth of field, but then I’d lose the sharp focus of whatever I was taking a picture of.
Finding the right balance of focus and depth of field is important.
In the end, I enjoy the small details present in nature, and I’m willing to “smell the roses” as it were. I wouldn’t consider it shoegazing as much as appreciating the things in life that help paint the mosaic of a landscape. We may not be able to see each individual leaf on every single plant when we look at a landscape, but knowing that they’re down there and have their own, intrinsic beauty just adds to the picture.
Sometimes the small parts of nature reflect its perfection.
I would encourage you to kneel down sometime and take a closer look at the nature around you. You might be surprised at what you find!
As always, have fun!
– Benjamin M. Weilert
Shoot the Moon
A few months ago, I discussed some of the techniques for taking pictures at night. Now that we’re finally into fall and the nights are getting longer, I thought I would focus on some specific techniques to take pictures of the Moon. Unlike “painting with light”, photographing the Moon has different challenges. Sure, you’ll still want a tripod and remote, and your ISO should be relatively low, but if you really want your Moon shots to pop, there are a few more things you should probably know.
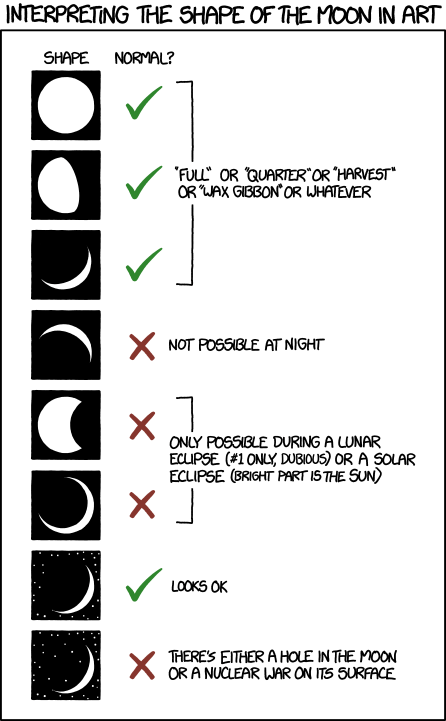
The first key difference between taking pictures of the Moon and painting with light is the shutter speed. While you’ll want a long exposure to capture the full extent of your light streaks with the latter, a shorter exposure time will help define the features of the Moon. Instead of appearing as a bright white circle in the sky, you’ll be able to capture the craters and plains of the Moon. You will still want your ISO low for these pictures, as you’re essentially taking photographs of a light source and the lower ISOs are more than adequate to capture that light.
Don’t just shoot the moon by itself, give it an interesting foreground.
Depending on the type of picture you’re trying to shoot, you’ll probably want the foreground to be filled with something other than dark sky. There are two ways to go about this: 1. Take your Moon pictures as it is rising or setting or 2. Use double exposures. Either way, you’ll want the Moon to be the subject of whatever you’re photographing, so remember to try and obey the “rule of thirds” when you can. Of course, maybe you’re interested in a close-up of the Moon’s surface. If so, you will want to keep your shutter speed a lot faster (and bump up your ISO as a result). The reason for this is due to the rotation of the Earth and Moon. Even if you focus on the moon with a superzoom lens, your picture might turn out blurry because your subject has moved.
If you get a chance, take some pictures of a Lunar Eclipse!
Finally, consider the many variations of the Moon when taking your pictures. From Supermoons to Lunar eclipses, there are some very interesting phases the Moon can go through that you might want to take advantage of. Whether it’s the sliver of the Moon just before it becomes new or the bright and spectacular full Moon, you’re likely to get a nice and crisp picture if you follow the above techniques.
As always, have fun!
– Benjamin M. Weilert
Trees are the Answer
If this is the case, what is the question? I’m sure there are plenty of Jeopardy-esqe responses to this, but the question I’m referring to is this: What is one of the most difficult common objects to photograph? One of the challenges of photographing trees comes in their grouping. A picture of a forest is neat, but unless there’s a subject, what’s the point of the photo? In Colorado, we’re definitely in a time of year where the fall colors can be the subject of a picture, but even this can sometimes be a challenge to capture without focusing on something specific.
Sometimes the color of the trees can be your subject.
Over the years, I’ve found a few ways to take pictures of trees to overcome this “subject-less” challenge. The secret lies in composition. Take the above photograph, for example, it’s a pretty generic photograph of some aspen in the fall. However, because the trees are backlit, the ones in the foreground are filled with vibrant color while the ones in the background are steeped in shadow. In fact, you could almost draw a diagonal line across the image and split the picture into these two dichotomies. By highlighting the contrast of the composition, there’s more interest to the photograph than just the fall colors.
If you can’t find a subject, try changing your perspective.
Another trick to try is simply a matter of changing your perspective. Instead of viewing trees straight-on, try looking up! It’s easy to not be able to see the forest for the trees, but if you’re right in the midst of them, their tall and sturdy trunks can help create a vanishing point. If you really want to accentuate this style of composition, use a wide-angle lens to capture the exaggerated height of the trees around you (as seen in the above photograph). Even without a fish-eye lens, if you shoot right next to the trunk of the tree looking upward, you’re likely to get some good leading lines.
Occasionally you will be presented with a subject . . . use it!
Finally, one way to make a tree a subject is to find one that stands out from the rest. This could be a lone tree on a prairie, or a dead tree in an overgrown forest, or even one tree highlighted by a ray of light. Whatever the reason, if the tree stands out from the rest of the forest, it can become the subject of the photograph while its brethren make up the background. If you really want the contrast between your subject and background trees to pop, try making the background black and white to accentuate the subject tree.
Hopefully, with these techniques, you’ll be able to shoot the trees instead of the forest.
As always, have fun!
– Benjamin M. Weilert
Painting with Light
One of the limitations I had with my photography years ago was that I couldn’t take good pictures at night. Part of this was due to the limitation of my camera: a point-and-shoot Olympus that I didn’t know how to fully use. Sure, there was an automatic setting for “night” that I occasionally utilized, but often the pictures I would get were more based on luck than anything else. Once I was able to dive deep into the settings of the camera, I found I could manipulate them to take the pictures I wanted. Still, the camera had reached the limits of its capability and I moved to a Nikon D7000 DSLR.
With a DSLR, pictures of cities at night are quite easy to create.
Now that my camera’s settings were much easier to control, I found the art hidden within night photography: painting with light. Due to the minimal amount of photons hitting the focal plane of the camera, long exposures are needed to fully capture the scene with as little noise as possible. Of course, with long exposures come additional challenges (aside from the aforementioned noise). The main challenge is keeping the scene in focus, as any movement will appear blurred. However, this challenge can be an asset when painting with light.
The lights of cars on a highway are just one example of painting with light.
In order to “paint with light”, there are a number of conditions to be met, including the stability of the camera and a moving light source. These conditions require three techniques:
- Shutter speed – This is the main technique for painting with light, as it allows the light source to move across the scene to create lines of colored brilliance. Usually 30 seconds is a good setting to use for maximum time to paint, as well as allowing enough light of the background to come through for context.
- ISO – In normal night photography, a low shutter speed can be used with a high ISO. While this can capture moments of action at night without the need of a tripod, it doesn’t work well for light painting and will often leave the resulting pictures grainy and full of noise. A nice, low ISO should be enough to capture the scene, especially if the shutter speed is set for a long amount of time.
- Tripod and remote – The crux of the whole operation is to ensure the background of the light painting remains unblurred while the light moves around the frame. To accomplish this, a steady tripod is needed to keep the camera from moving. Furthermore, one can use a timed delay setting to ensure the “shake” from pressing the shutter button doesn’t add to the camera’s blur. An even better alternative is to use a remote control to trigger the camera to take the picture.
This example of light painting was produced by a low-flying airplane mounted with active fireworks.
I have yet to go back out and take some more “light painting” photographs, but it’s always something I consider when doing long exposures at night. What kinds of art have you created through painting with light?
As always, have fun!
– Benjamin M. Weilert
Connect
Interested in learning more about Benjamin M. Weilert?
Have a question that wasn’t answered here?
Want regular updates e-mailed to your inbox?
Don’t hesitate to click this e-mail link to . . .
. . . ask for more information.
. . . receive answers to your questions.
Sign up for the monthly newsletter!
If you are on the following social media platforms, you can follow Benjamin M. Weilert!
 is on: