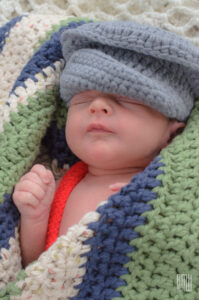
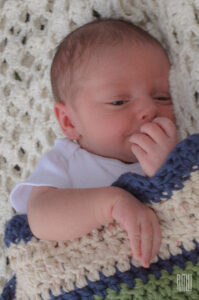
Like I said last month, one of my weaknesses as a photographer is taking pictures of people. There are certain challenges when taking pictures of a proposal, but there are somewhat different challenges when taking pictures of weddings or newborns. When another friend of mine asked me to take pictures of their newborn son, I was happy to oblige, even if I had to let them know it isn’t my forte. I had a rough idea of what to do, but I also learned a lot. Since this was my first time taking pictures of an infant, there were plenty of lessons learned. If you’re looking into expanding your repertoire to include infant photography, the following are a few things to consider:
 1. Lighting
The fundamental element of photography (aside from the camera itself), lighting determines a lot about how you take a picture. It will determine if you need to increase your ISO or shutter speed settings. While you can control the lighting indoors, it’s often not bright enough. If you have your own set of lights, you might be able to overcome this indoor challenge, but these lights can be expensive. The natural light of outdoors is usually bright enough but has its own quirks. If it’s too bright, the child might be squinting in the pictures. The shadows will also be sharper with bright sunlight, which isn’t necessarily something you would want for these kinds of pictures. Light cloud cover will soften shadows and should provide enough illumination to work with, even if it can be a little inconsistent. In the end, if your pictures look “soft” with the lighting you have, you’re doing well!
2. Parental requests
Even though you are the photographer, and would know what works best for you, the parents are ultimately the individuals who are paying you for your service. If they have specific requests for the photo shoot, you should try to oblige them the best you can. If they have an outfit or prop they want to be included in the pictures, don’t deny their request. Still, make sure you’re comfortable with the kinds of requests the parents will make. If you feel the infant might be in danger, you can deny the specific requests. If you are required to bring clothing or props for the child, you can gently express that the parents should provide those things for the shoot. Even if you think the parents’ ideas are silly or won’t work, the worst that could happen is that the pictures just don’t turn out.
3. Gear and settings
For this particular photo shoot, I was dealing with rainclouds and intermittent weather issues that limited the amount of time I had to shoot. The baby was also somewhat fussy, which added to the challenge. In terms of lenses, you’ll likely want a macro / close-up lens that will allow you to get close to the child and create a narrow depth of field to blur out the background. When I downloaded the pictures, I found that my shutter speed wasn’t nearly fast enough. Many of the photos were blurry because the infant was moving too much (as babies are liable to do). You might have to sacrifice graininess (by increasing ISO) in order to get the right shutter speed, but the shutter speed should be prioritized when you’re choosing your settings.
 4. Post-processing
When you finish the shoot, you’ll have a ton of pictures, most of which will be pretty similar from image to image. Get rid of anything that’s blurry (again, shutter speed is key), and find the pictures where the baby is smiling (a rare treat, but worth the parents’ money). Since you should be taking pictures in RAW format, use Photoshop (or your program of choice) to perform a few simple post-processing tweaks to get the perfect pictures. As I mentioned during the section on lighting, you’ll want the pictures to appear “soft,” so tone down shadows and highlights while also minimizing contrast and clarity. You’ll know you have the right post-processing settings when the baby will start to “glow” just a little bit. This removes most minor blemishes on the baby’s skin, as well as giving the photos a “heavenly” feel. At this point, you might want to do some black and white versions, which can also remove some sharp contrasts in color to add to the soft effect.
In the end, I had a couple dozen passable shots when my photo shoot was finished. I could have had quite a few more if I had applied the tricks I mentioned above. Some aspects of the shoot might be out of your control, but if you do your best with what you have, you might get some good photographs for the happy parents.
